Personalised Letter Ornaments
Why do I keep thinking oh that thing I made years ago would make a good blog post, then I have to work out what materials I used from 4 year old photos, work out where you can get the yarn from now or if it’s been discontinued, which thankfully this yarn hasn’t been discontinued and you can still get it. And then I have to actually remake the thing because I can’t remember how I bloody made it!
So in true professional blogger style, I will bring you along the journey as I revisit these letter ornaments I made for each of my kids way back before I even had my 4th baby, and he is about to turn 3!

This blog post contains affiliate links. I may receive a commission from purchases made through these links.
Materials
This was made using Bernat Maker Home Dec yarn - Here it is from Amazon! You will also need to choose a contrasting colour to create your letters with. I just used a bulky grey cotton yarn I had at home (remember my motto is I use what I have), but you could get a second colour of the Bernat Maker Home Dec yarn.
You will need a 6mm crochet hook and a darning needle.
You will also need a 10cm metal hoop, which are available from Spotlight in Australia.
And lastly you will need a hot glue gun. You could always sew the letters on with a needle and thread, but I don’t love hand sewing so I went for the quick and easy hot glue.

Crochet Pattern
Round 1: Start with a magic ring and make 6 SC into ring. Pull end to close
Round 2: CH 1, 2 SC in each stitch around. (12 SC)
Round 3: CH 1, *2 SC in next ST, SC in next ST; repeat from * around, join to first ST with SL ST. (18 SC)
Round 4: CH 1, *2 SC in next ST, SC in next 2 ST; repeat from * around, join to first ST with SL ST. (24 SC)
Round 5: CH 1, *2 SC in next ST, SC in next 3 ST; repeat from * around, join to first ST with SL ST. (30 SC)
Round 6: CH 1, *2 SC in next ST, SC in next 4 ST; repeat from * around, join to first ST with SL ST. (36 SC)
Round 7: This round joins your work to the hoop. Work your SC stitches around the hoop and into Round 6 at the same time. CH 1, 2 SC in next ST, SC in next 5 ST, repeat from * around, join to first ST with SL ST. (42 SC)
Round 8: CH1, SC in same ST, *CH 4, SK 1, SC in next ST; repeat from * around, join to first ST with SL ST. (21 SC, 21 CH-SP)
To create the hanging loop, tie off your active loop, and create your long hanging loop so it will fit over a Xmas tree branch!
Fasten off the yarn and sew in the ends.

You now have your background and you will have to create your letters. If I were an amazing blogger, I would create a tutorial on how to do all 26 letters, but that will make this blog post take until Xmas 2026, so I’m just going to skip that and share some good links to actual tutorials for letters.
The Moogly Blog has created a great library of all the letters that you could use to create your letters. If you find the letters tricky, you could always cut them out of felt sheets.
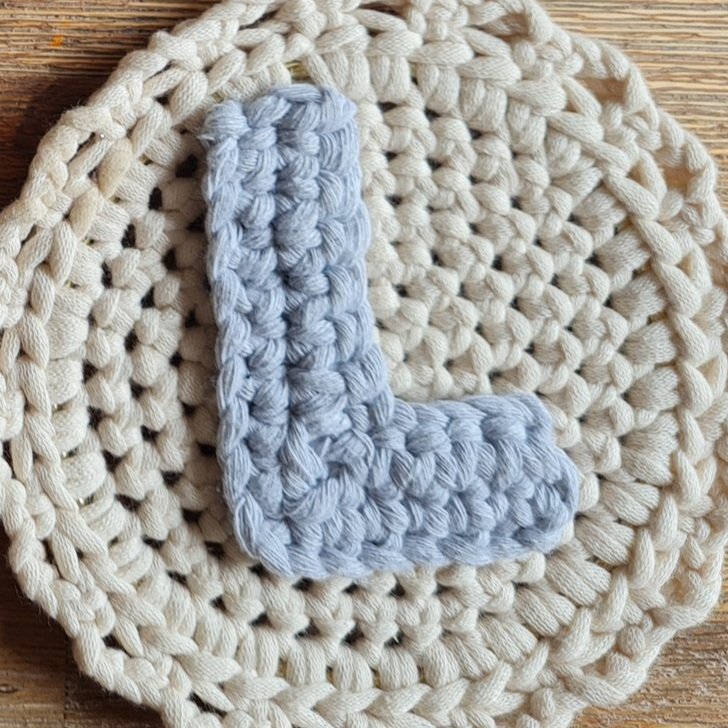
These letters were made up as I went. I chained a bunch of chains, laid the chain out in the shape of a letter, and then had a look at where I needed to thicken it up and add stitches, or skip stitches to create a bend in the letter.
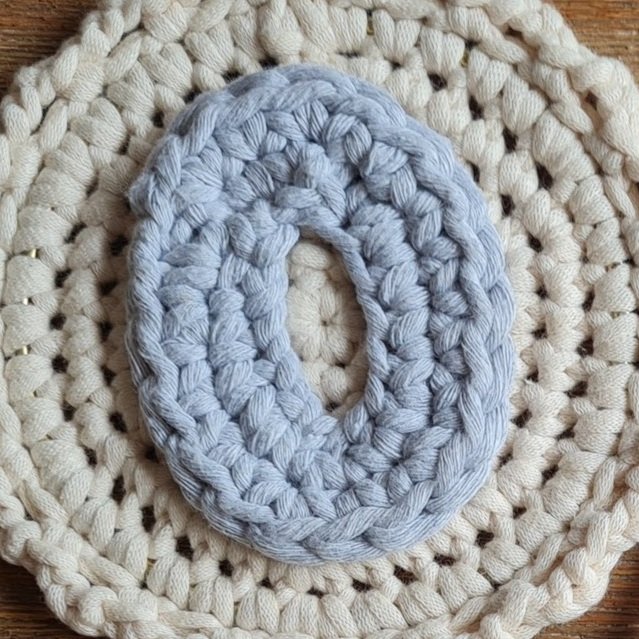
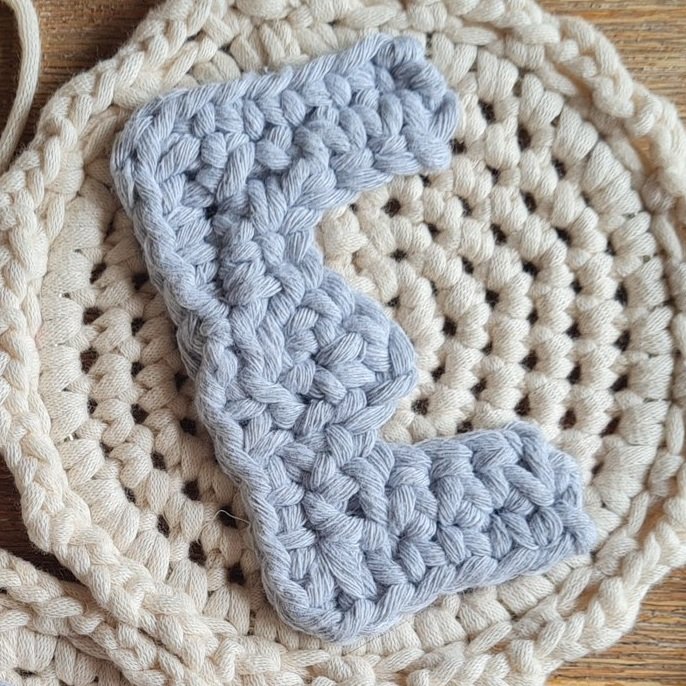
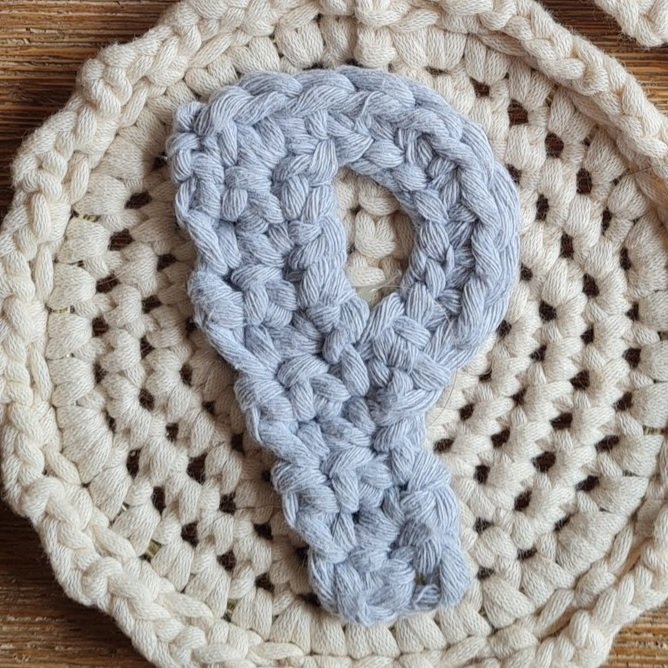
Once you have your letters created, grab out that hot glue gun and stick that letter down. Be sure to press it down to make sure the hot glue sticks strong. Once it is glued down and cooled and set, let the kids hang their letters up! My kids love placing their letters on the tree, and they always make sure that they are in height order according to their ages. I find it hilarious that there isn’t fighting about whose letter is the highest, they just want them in age order.
I hope you enjoy making up letter ornaments for the loved ones in your life and would love to see your version of this little craft. Share them with me over on Instagram - tag me in your pics!